Friday, February 18, 2011

Cherries and Cream Cupcake


These are the cupcakes I promised to post for you. This is the second flavor I made to bring to work on V-Day. Ok my inspiration for this honestly was a bottle of soda I had seen. It was Cherry n cream flavor. I thought hmmm that would make a good cupcake and well this is the result. This is a Cherry filled vanilla bean cake topped with super white swirled sparkly pink buttercream icing with a cherry on top. Yea that's a mouth full but really I spent a full week dreaming of making these and how they would turn out. I'm pretty happy to report that they actually turned out as pretty as I imagined them.

I was making these the same time I was making the red velvet so please forgive me, I did not take pictures of every step like maybe I should have. These are a little bit more involved then mix and scoop but I am incredibly happy with the process.

Ingredients for the cupcake:
1 ½ cups + 2 tablespoons cake flour
1/4 teaspoon salt
1 1/4 teaspoons baking powder
1/2 cup unsalted butter, room temperature
1 cup sugar
1 egg
2 egg whites or 4 tbsp egg substitute
1/2 cup milk
1/4 cup sour cream
1 1/2 teaspoons of pure vanilla extract
1 vanilla bean (you could leave this out but it is soooo worth it to use)
1 can cherry pie filling (you can make your own but I used the canned stuff this time)
 **Preheat Oven 350 degrees**

1. In a sauce pan heat milk , split and scrape vanilla bean into milk, place empty pod in milk also. Slowly heat to just under a simmer for several minutes take care not to scald. Take off heat and let steep and cool. Remove empty pod and set aside to dry.
2. Beat the butter for about 3 minutes on medium speed, then add the sugar and beat until light and fluffy, about 3 minutes.
3. Add the egg and beat for 30 seconds. Add the egg whites, one at a time, beating for 30 seconds each.
4. In one bowl sift together the flour, baking powder, and salt. In another whisk together the vanilla steeped milk, vanilla extract, and sour cream.
5. Add the flour mixture and the milk mixture to the butter sugar egg mixture in alternating additions (dry-wet-dry method), starting and ending with the flour. Mix until just combined being sure to not over beat.
6. Divide the batter into cupcake papers in a muffin tin and bake at 350F for 18-20 minutes or until slightly golden brown. Tops may seem soft to the touch but will harden as they cool.
7. Set on wire rack to completely cool before frosting.
8. Once cool using a paring knife cut a hole in the middle of the cupcake from the top. Do not discard "lids" as you will replace after filling. You can also use a cupcake corer if you have one handy.
9. Fill with a small amout of filling, do not over fill as it will ooze out when you put the lid back on. Place lids back on and set aside for icing.

Icing:
1 1/2 sticks butter
2 tsp vanilla extract
4 cups powdered sugar (I had used 5 but was told it was to sweet so I cut back the recipe)
white food coloring

1. Whip butter in electric mixer until light and fluffy
2. Add Vanilla extract and mix to combine.
3. Add powdered sugar one cup at a time
4. Add as much/little white food coloring as you want. Remember to incorporate this fully throughout the whole icing, you may need to mix by hand.
5. Whip icing until light and fluffy

10. Spread/pipe icing on cupcakes as you wish. I piped mine on using a start tip in a circular motion. I used sparkly pink icing gel made by wilton (can be purchased at Michaels) and used the same technique as in my chocolate peppermint cupcake recipe. Make a few stripes of Pink inside the piping bag fill with super white icing. the pink will naturally swirl in when you squeeze out the icing onto the cupcakes.
11. Top with a cherry :)


Reviews: Well there wern't any left....the day I made them they were super good but it seemed the longer they sat the sweeter the icing turned. I had used 5 cups of powdered sugar so I listed the recipe as 4 cups. 


Enjoy!
<3 Laura ^.^

Wednesday, February 16, 2011

Classic Red Velvet Cupcakes

Holy moley! Where has this past week gone? I have been *SO SO SO* busy with work and hectic stuff going on that I have not had time to post anything. Please forgive me! I wanted to post this before Valentines Day but I didn't get the chance. For Valentines Day I made cupcakes for work. I made two kinds Red Velvet and a vanilla bean (recipe posted later this week). Earlier last week I asked what kind of cupcakes they wanted me to make, So what do they do? They google...yes he google and the first thing that came up was Red Velvet. Can you get any more Valentines Day then dark red cake and stark white icing? I think not! Here is my cupcake and icing recipe (and secret for super white icing).

**Pre-heat oven 350 degrees**
Cupcake:

3 1/3 cup cake flour (not self-rising), sifted
3/4 cup (1 1/2 sticks) unsalted butter, softened
2 1/4 cup sugar
3 large eggs, at room temperature
2 oz red food coloring
1 1/2 tsp pure vanilla extract
1 1/2 tsp salt
1 1/2 cup buttermilk
1 1/2 tsp white distilled vinegar
1 1/2 tsp baking soda

1. I always prepare my cupcake pans ahead of time, line them with cupcake liners if using a silicone pan no need to line or grease but do remember to place them on top of a baking pan.
2. In a large bowl, on the medium speed of an electric mixer, cream the butter and sugar until very light and fluffy, about 5 minutes. Add the eggs, one at a time, beating well after each
3. In a small bowl, whisk together the red food coloring, cocoa, and vanilla, add to the batter and beat well.
4. In a measuring cup, stir the salt into the buttermilk. Add to the batter in three parts, alternating with the flour.(Flour, milk, flour) With each addition, beat until the ingredients are incorporated, but do not overbeat.

5. In a small bowl, stir together the cider vinegar and baking soda. Add to the batter and mix well. Using a rubber spatula, scrape down the sides of the bowl and stir by hand getting the bottom of the bowl, making sure the ingredients are well blended and the batter is smooth.
6. Divide the batter among the prepared pans. Bake each tray for 20 minutes, or until a cake tester inserted in the center of the cake comes out clean. Take care not to overfill the cupcake liners, I tend to do this and my cupcake tops come out like muffin tops.
7. Let the cupcakes cool in the pans for 1 hour. Remove from the pans and cool completely on a wire racks before icing.


Cream cheese Icing:
2- 8oz packages of cream cheese, softened and cut up in pieces
6 tbsp unsalted butter softened and cut into pieces
2 tsp pure vanilla extract
4-5 cups powdered sugar, sifted (sweeten to taste but remember the more powdered sugar you add the less you will taste the tangy cream cheese which is a classic component for Red Velvets)
****White Food Coloring

1. In a mixing bowl beat cream cheese and butter until smooth, stop often to clean off whisk attachment.
2. Add Vanilla and beat in well.
3. Add powdered sugar one cup at a time, incorporating well.
4. Add white food coloring, use as much as you need to gain the whiteness you desire
5. Whip on high speed for several minutes until light and fluffy
6. Refrigerate for 1-2 hrs before piping onto cupcakes.

****I have to say I am in love with white food coloring. I hate when you want really white icing but the butter tinges it an off white. And if you aren't using a clear vanilla extract, that can color your icing as well. The answer is a simple trip to Michaels away! This is definetly a time when more is more. It makes the icing bright and white and B-E-A-U-T-I-F-U-L!! Just make sure you incorporate it well into the icing.

These were a HUGE hit. Everyone told me how much they loved them. And I have to admit I gave in and had a small bite of one, and wow it was good!

Enjoy!
<3 Laura ^.^

Wednesday, February 9, 2011

Bacon Wrapped Oven Baked Steak


So I can make various things one thing I *always* screw up is Steak. The first time I ever made steak I used a store bought marinade and used a stove top grill pan....well needless to say I had to open the windows with all the smoke that built up in the kitchen. But I am determined to get this right! So what better way (and easier way) thank to bake it? Why not? ...yes I do realize this is technically cheating...I guess...

Ingredients:
2 cuts of steak
6-8 strips bacon

Marinade:
1 cup Italian dressing
2 tbsp dijon mustard
2 tbsp worcestershire sauce
pinch salt
pepper
garlic


1. Using two zip lock bags (one for each steak), prick steak with fork, sprinkle with garlic salt and pepper, place steak inside bags and divide marinade evenly over steaks. Squish around in your hands making sure marinade covers steak. Refrigerate for about an hour. (Do not over marinate this is more of a quick marinade then a long term marinade, leaving it to long will start to "cook" the meat and it will not be edible.)
2. Take out of the refridgerator 30min prior to cooking, you want the steak to be room temp so it doesnt seize up and contract when you sear it before baking. Also make sure you take the meat out of the marinade but don't throw it out we will use a bit of it later.
3. Heat a skillet with a small amount of butter. Yes I know I don't normally use butter but really for something like this...it's just simply necessary.
4. Depending on how large your steaks are depends on how many strips of bacon you will need. For the larger piece  I used 4 for the smaller one I only needed 3.  Wrap each strip around the steak and secure with tooth picks.
5. Sear in hot skilled until brown crust forms on each side (2-3 minutes per side)

Pre-heat oven 450 degrees

6. Line a baking sheet with foil (believe me this makes clean up easy-peasy don't skip this). Place seared steaks on baking sheet and top with a small amount of the left over marinade. Place in 450 degree oven for 18-25minutes. One of my steaks was smaller then the other, this worked out well because my steak was well done (the way I like it) and Sam's was Med-rare (the way he likes).


***Note- Baking time will vary based on how you enjoy your steak. You can either cut into the center to see how done it is (some can tell by touch), but the best way to tell is by taking an internal temp of your steak.

  • Very Rare Steak – 120°
  • Rare Steak – 125°
  • Medium-Rare Steak – 130° – 135°
  • Medium Steak – 140° – 145°
  • Medium-Well Steak – 150° – 155°
  • Well-Done Steak – 160°
One thing to keep in mind is that just because you take a steak off of the grill doesn’t mean its through cooking. The heat built up in the steak will continue to cook the meat until it begins to cool off, adding up to an additional 5 or 10 degrees of doness. This means you have to undershoot your steaks, removing them from the grill/oven just before they reach the desired temperature. Undershooting is a good strategy anyhow, since you can always throw it back on the grill/in the oven (in shame) if its not properly cooked, but you certainly can’t “uncook” a steak. ***

Side Dishes- I served this with pasta alfredo, saute onion on top of the steak, and saute brussel sprouts with butter and bacon.


So this is only the second time I have made steak but it came out pretty darn good if I say so myself. 


Enjoy,
<3 Laura ^.^

Sunday, February 6, 2011

Over-stuffed Shells...


I just need to start off by saying...Happy Devils winning Sunday :) oh yea and some football game is on today too *shrugs*

It's one of those "I need comfort food" Days...

Ingredients:
3lbs ground turkey (you can use, beef, sausage, or chicken if u prefer or none if you want also)
1 large green pepper, diced
1 onion, diced
1 lb Spinach (fresh or frozen)
3lbs ricotta cheese
16oz mozzarella cheese, shredded
2 (13oz each) Jars of favorite tomato sauce
3 cloves garlic, cut in half long ways
1 box Jumbo Pasta Shells
Salt
Pepper
Italian seasoning
Garlic powder

Did you know? Spinach has a high nutritional value and is extremely rich in antioxidants, especially when fresh, steamed, or quickly boiled. It is a rich source of vitamin A, vitamin C, vitamin E, Vitamin K, magnesium, folate, iron, vitamin B2, calcium, potassium, vitamin B6, folic acid, protein, zinc, and omega 3 fatty acids.

**Prepare pasta shells-boil for 10-12minutes, drain seperate shells and set aside, u want them a little stiff so they hold shape when stuffing, cooking will finish when baked in oven**

1. Warm a large skillet with olive oil and place 3 cloves of garlic sliced in half in the oil. When you can smell the garlic take out of oil and disguard. (you just want the garlic to flavor the oil, don't let the garlic cook or brown)

2.While your oil heats dice peppers and onions season with salt pepper and italian seasoning.


3. Saute in oil until translucent and starting to gain color. Set aside until later.
4. If using frozen spinach defrost and squeeze out ALL of the liquid before sauteing.  If using fresh rinse and dry saute till wilted. Mix with set aside peppers and onions.
5. In the same skillet brown meat, season with salt pepper garlic powder and italian seasoning. As always I do not use anything in my pan just the natural fat in my ground meat to brown it. I do drain my meant to allow best browning.
6. Mix veggie mixture in with browned meat add 2 cups of tomato sauce
7. Add 8oz mozzarella cheese and the entire container (3lbs) ricotta cheese.(I know it looks like a ton of stuffing but believe me you'll go through it)
8. Spoon sauce on the bottom of a baking dish (this keeps the shells from sticking) and Pre-heat oven to 450 degrees.


9. Using a spoon (I use a soup spoon) stuff each shell lining them up in your baking dish. In mine I was able to do 3 rows of 7 per dish and did two dishes full.This used up all but 2 shells out of the box that I prepared.


Aren't they pretty? I definetly over stuff these, have to balance out those carbs with some protein!

10. Once you have finished stuffing top with additional sauce and mozzarella cheese.
(Sorry for the dark picture, I realized after I put them in the oven that I forgot to take a picture for this step, so I stuck my camera in the oven :D)

11. Bake for 25min until sauce is bubbling and cheese is brown. Take out and let sit for about 5min before serving. 


So these have everything you might want in them. Protein, Veggies, Carbs but hmmm how about some cheesy garlic bread made using a compound butter.

Compound Butter's are mixtures of butter and supplementary ingredients. Primarily, they are used to enhance flavor in various dishes


Ingredients:
1 loaf of Italian Bread

Compound Butter:
1 stick unsalted butter, room temperature
5 cloves of garlic, minced
mozzarella cheese
pepper
1/2 tsp salt
garlic powder
Italian Seasoning

1. In a small bowl cut up 1 stick of butter

2. Mince 5 cloves of garlic and sprinkle with salt

3. Mix garlic and salt with butter
4. Add Italian seasoning and pepper
5 Mix all ingredients well! 

- This does much better with very soft room temp butter. I used the back of a fork to smoosh everything together.

6. Slather (yes, I said slather) on bread top again with a sprinkle of garlic powder and pepper

7. Toast in oven @450 degrees for 15 mintues (I did this the same time as I was baking my shells so I used my toaster over...multitasking!)
8. Take out sprinkle with mozzarella cheese and bake for an additional 5min until cheese is melted and brown.
9. Cut into slices and serve!

If you have any left over compound butter you can easily roll it into a log in plastic wrap and place in the freezer. Remember to lable with date and flavors. Then you can just reach for the flavor combo you want if you have more than one. Compound butters are great to have on hand when making quick week night meals. Can use them with fish, steak, chicken. Possibilities are endless!


Enjoy!
<3 Laura ^.^

Saturday, February 5, 2011

Sausage, Peppers, and Onions...OH MY!!


I make this all the time especially if we are having people over for dinner, feeds an army! Italian Sausage, Pepper, Onions sometimes I serve it as sandwiches other times I add mozzarella cheese, sauce, and serve it over pasta. It really depends on what the family feels like that night. Now when I first started making this it would take me FOREVER! And I'm not exaggerating. I would cut up the sausage links into bite size pieces then pan fry each piece....I would have like 3 skillets going on the stove (because none of the ones I had were big enough). Well over the summer I made a HUGE pan of this for my brother's engagement party. I stood in the kitchen thinking "OK I have to make this for like 70 people....This is going to take me days I need to figure out a "short cut" So after some thinking I lined several cookie sheets with foil and I cooked the Sausage links in the Oven. They came out so tender and juicy that I never looked back at the old way of doing things. WHY didn't I think of that sooner...was definetly a "DUH!" moment...

Ingredients:

18-20 Italian Sausage Links (I use a mix of sweet and spicy)
2 green peppers, sliced in long slices
2 red peppers, sliced in long slices
2 yellow peppers, sliced in long slices
(Instead of using bell peppers like I did you could use Italian frying peppers or Cubinelle peppers)
2 Soft Ball sized Onions, cut in strips (directions below)
1 medium size jar of sauce (omit if you are making this as sandwiches)
2 cups mozzarella cheese (omit if you are making this as sandwiches)
1 box of pasta (your choice-I have used spaghetti and also egg noodles)
Garlic
Salt
Pepper
Olive Oil

1. preheat over 450 degrees line a cookie sheet with foil (this makes for easy clean up). Line the sausage links up on the cookie sheet about an inch apart. Bake in oven for 20minutes take out flip sausages over and cook for an aditional 20minutes.


2. While the sausages are cooking do some Mise en place. Cut your peppers in strips. I love using the tri-color peppers because it adds color and some sweetness.


 3. Do the same with the onions. Easiest way I have found is to cut the onion in half and cut half moon slices then pull the layers apart.
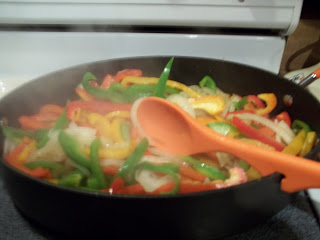
4. Heat a large skillet with olive oil, once the pan is hot add onions and peppers little at a time. With each bunch you add remember to add salt pepper and garlic powder. Continue to stir until veggies are soft and start to get color.

5. After the sausage has rested for a few minutes cut into bite sized pieces and mix into the veggies.
**NOTE- At this stage is where I would stop if I was making them for sammiches. Just cut open a roll and serve!**

 But if you want to make something a little more special, continue reading...

6. Add Jar of Sauce and let simmer.


7. While simmering boil your pasta. Once pasta is done drain and put back into pot. For this next step use which ever pot is bigger either the skillet you have been using for the onions and peppers or the pasta pot. In my case I used the pasta pot.
8. Combine everything in pasta pot, and top with 2 cups of mozzarella cheese. Add more salt, pepper, and garlic to taste. Combine well.


9. Serve in a bowl topped with some Parmesan cheese.

OK so the final product doesn't look all that pretty, hey I'm trying to work on my photography skills...but it is soooo yummy.

Speaking of my photography I bought a new camera! I was *so* excited. its a Kodak 14.0MP camera. My old camera was only a 3mp lol so my pictures should be getting better soon.


Enjoy!
<3Laura ^.^

Friday, February 4, 2011

Oatmeal Rasin Cookies

I have had a real "craving" for these lately. I'm sure any normal person would just go out and buy a package but no not me! So I took the recipe on the box of oats and added stuff and took away stuff. I played with the recipe and came up with a chewy oatmeal raisin cookie, crispy on the outside chewy on the inside. I had one (for breakfast- I mean it is full of oats and fruit right? that's kinda healthy right?)


Ingredients:

1/2 cup (1 stick) butter, softened
2/3 cup light brown sugar, packed
1 egg
1/2 teaspoon vanilla extract
3/4 cup all-purpose flour
1/2 teaspoon baking soda
1 teaspoon ground cinnamon
1/2 teaspoon salt
 2 cups rolled oats
 1 cup raisins
Preheat oven to 350°F

1. In a large bowl, cream together the butter, brown sugar, egg and vanilla until smooth.
2. In a separate bowl, whisk the flour, baking soda, cinnamon and salt together.
3. Stir this into the butter/sugar mixture.

4. Stir in the oats and raisins


5. At this point you can either chill the dough for a bit in the fridge and then scoop it, or scoop the cookies onto a sheet and then chill the whole tray before baking them. You could also bake them right away, if you’re impatient, but I do find that they come out with a better final product after being chilled. (I was impatient but still wanted to chill the dough so I put it in the freezer for about 30min in a metal bowl)


Side Note: Make sure you use Parchment Paper I grabbed wax paper and flipped it over so the waxy side was face down so it didn't ruin my cookies but it did smoke a bit in the oven. Yea another blond moment in the kitchen...so sue me ok?!

.
6. The cookies should be two inches apart on a parchment-lined baking sheet. Bake them for 10 to 12 minutes, taking them out when golden at the edges but still a little undercooked-looking on top. Let them sit on the hot baking sheet for five minutes before transferring them to a rack to cool. If you try to take them off the parchment paper before they cool a bit they will just fall apart they need to "set up" a bit before being moved.
Pre-Cooked
After Baking

These have to sit for 5min after coming out of the oven. Believe me it is worth the wait! They are warm and chewy and yummy...

Enjoy!
<3 Laura ^.^

Tuesday, February 1, 2011

faux pah-sketti

Ok so since I had surgery there are several things that I try to not eat, or only eat occasionally. These include bread, pasta, and rice. So what happens when I really want something that contains these items? I improvise! After my last post, if you remember correctly I had a ton of stuffing and more than half a head of cabbage. So I played around and came up with this faux-spaghetti

Ingredients:
1.5 lbs ground turkey
1 onion, diced
1 green pepper, diced

1 yellow pepper, diced

1 red pepper, diced

2 tbsp olive oil
1 small to medium sized head of cabbage
1 jar tomato sauce (2-3 cups if using home made)
1 cup + more for garnish shredded parmasean cheese

Salt
Pepper
Garlic
Italian seasoning

Now all of the above has been previous cooked for me due to me using left overs so this was a very quick and easy week night meal. You can easily prepare the stuffing on the weekend and reheat and mix everything one night during the week. If you are prepping ahead I would also suggest shredding the cabbage by simply cutting it in half and running your knife through it. But if you are making this on it's own (no from left overs) it is still an easy meal.

Cooking on it's own:
1. Cut the core out of the head of cabbage and boil for a few minutes until cabbage becomes soft. Shred cabbage into long strips.

2. Saute peppers and onions season with salt pepper garlic and italian seasoning set aside to cool
3. Brown the ground turkey (as always I dont use anything in the pan the natural fat in the meat is enough to brown)- drain fat in neccessary-season with salt pepper garlic and italian seasoning.

4. Mix veggies with ground meat add in shredded cabbage and tomato sauce
5. Cover and let it heat through for about 10 minutes.
Can serve as is or with a side salad and crusty bread.

Cooking as left overs:
1. Saute precooked and pre-shredded cabbage in a large skillet with 2 tbsp olive oil until soft and almost see through.
2. Top with pre-made left over "stuffing" (ground turkey, veggies, seasonings and sauce)


3. Can add more sauce if you like. I did :) I also topped with Parmesan cheese cover and let it simmer for about 10 minutes. 

Can serve on it's own, with a side salad and with crusty bread or garlic bread if you'd like. 

I LOVE this. I could eat it for days (and I have). My picky tummy likes it and it definitely doesn't make me miss that pasta. This definitely feeds a crowd, we had left overs for several meals.


Enjoy!!
<3 Laura ^.^