Tuesday, July 23, 2013

Summer Pasta Salad with a Creamy Poppy Seed Dressing


Tonight for dinner I wanted something easy. I had some left over Zucchini and some Yellow Squash from our neighborly Vegetable Fairy. This was super easy had all the ingredients on hand, and I just baked up some Chicken Breasts as the protein in the toaster oven with salt pepper and random spices. 


Ingredients:
1 lb Pasta, any shape that you have on hand
2 Large Tomatoes, largely diced
1 Medium Zucchini, sliced in rounds then quartered
1 Yellow Squash, sliced in rounds then quartered
1 cup Carrot, shredded
1/4 cup Parsley, minced
1/2 cup Greek Yogurt
1/2 cup Poppy Seed Dressing
Salt
Pepper
Garlic Powder
Onion Powder

For the Creamy Dressing:
Combine the Greek Yogurt, the Poppy Seed Dressing, Parsley, and spices in a bowl and set aside. 


1. Boil Pasta, set aside to cool
2. Dice Veggies
3. Shred Carrots
4. Combine Vegetables, Pasta, and Dressing. Chill until you are ready to serve. 


Dinner is served! Easy Breezy meal that took no effort at all! Super nice to have during a heat wave, wish I had whipped it up last week. It was a beautiful day today even got to sit outside tonight until the bugs started to bite!

A great way to serve this would be in mason jars for an on the go picnic idea!

Enjoy ^.^
Laura <3

Monday, July 22, 2013

Roasted Summer Vegetable Lasagna


I love eggplant. It is one of my favorite things to cook with glossy and deep purple skin is pretty to sit on the counter until you get around to cook with it! Grilled, charred, cubed, saute, roasted it's tender and smokey and a great meaty fill in for vegetarian dishes. This recipe could be made fully vegetarian just omit the ground beef I am 100% sure you won't miss it. 

Last week we took a trip to the farmers market store. I loaded up on veggies to use all week..then the heat wave hit. It was way to hot to turn on my oven and I really wanted to make a roasted eggplant lasagna. I made one last summer with veggies from out neighbors garden and fell in love with the meaty smoky dish. The heat wasn't so bad on Sunday so I broke out the oven! 

Our neighbor plants a huge garden every year and sometimes we get visits from the vegetable fairy. He drops off bags of veggies on our porch. This week he dropped off some cucumbers that I used in salads, some green onions which I used in this dish, and a yellow squash that I have not used yet. 

Did you know: 
Eggplant is Brain Food. Research on eggplant has focused on an anthocyanin phytonutrient found in eggplant skin called nasunin. Nasunin is a potent antioxidant and free radical scavenger that has been shown to protect cell membranes from damage. In animal studies, nasunin has been found to protect the lipids (fats) in brain cell membranes. Cell membranes are almost entirely composed of lipids and are responsible for protecting the cell from free radicals, letting nutrients in and wastes out, and receiving instructions from messenger molecules that tell the cell which activities it should perform.

Ingredients:
2 Large Eggplant, sliced lengthwise
1lb Ground beef (turkey, chicken, sausage any mix or opt out all together)
2 cups Tomato sauce
1/2 large bag frozen mixed vegetables
2 Zucchini, diced
12 Mushrooms, diced
8 Green onions, sliced thin
1 Yellow onion, diced
1 Green pepper, diced
1 Large container ricotta cheese
2 cups Mozzarella cheese, shredded
EVOO
Salt
Pepper
Garlic powder
Onion powder
Italian Seasoning


1. Slice Eggplant, salt, press for 30 minutes. Place on baking sheets season with pepper, garlic powder, onion powder, Italian seasoning drizzle with EVOO and roast  400° for 30 min. Let cool on sheets. 
2. In skillet brown meat season with salt, pepper, garlic, onion, and Italian seasoning
3. Dice veggies and mix with browned meat, once browned add in the 1 1/2 cups sauce.


4. Mix Ricotta cheese with pepper, onion powder, Italian seasoning, and garlic powder, set aside.


5. Once the eggplant is cooled use the remaining 1/2 cup sauce on the bottom of your baking dish and create a single layer of eggplant on the bottom. 


6. Top the eggplant layer with the mixed vegetable/beef.


7. Top this layer with the ricotta mixture.


8. Repeat steps 5-7 until all the ingredients are used. Top with 2 cups of Mozzarella cheese.


9. Bake at 350 for 1 hour. Let stand for 30 minutes before serving for it to set up.


As you may notice I did not add additional sauce in the layers, I did not want to to be to moist and squishy and not set up enough to cut without it falling apart. I served this with a green salad and some last minute garlic bread. The nice thing about dishes like this is that so many of the vegetables are able to me swapped out for what ever you have on hand. It's a summer garden empty your fridge kind of dish. 

It was yummy and we had left overs for dinner tonight. 


Enjoy ^.^
<3 Laura

Friday, July 19, 2013

Protein Bars 1.0


Boy has it been hot this week! I think we are in day 6 of the heat wave that is supposed to be ending this weekend. I HATE hot weather. It's icky, I can't ever seem to find enough motivation and frankly I miss my sweaters. I love the beautiful sunny days, but I am an autumn girl..funny since I was born in Feb. I hate the super cold too...but I would rather it be freezing cold than grossly hot. 

Another thing I hate about the heat is that it is harder to bring snacks with me during the day. Banana's turn to smush and stink up the car, cheese get ucky too. A girl can only eat so many almonds. I love protein bars the problem is is that most of the ones on the market are covered in a "yogurt" substance or chocolate and again in the weather...not so appetizing. Or they are expensive...I love the Quest brand, especially vanilla almond crunch flavor but they do have some artificial ingredients in them, so I have been set out to make my own....I did some googling and found a bunch of recipes online and tried them out, changed ingredients, and came up with this...better yet it's a no bake! Welcome Protein Bar 1.0 experiment....

Recipe:
8 Scoops Whey Protein Isolate Chocolate Peanut Butter Flavoring ( I used this... )
3/4 Cup Raisins
1 Cup Natural Peanut Butter
3/4 Cup Crasins
1 1/4 Cup Whole Milk
6 Cups Oats

Instructions:
1. Prepare a 9/13 baking pan with wax paper
2. Place all ingredients into a large bowl
3. Mix...I used my hands was easiest.
4. Dump mixture into prepared baking pan press evenly
5. Place in refrigerator for 24 hours to set
6. Cut into desired amount of bars. 

I cut them into 26 bars, placed them into individual zip lock snack bags and put them back in the refrigerator. If no one but you eats them you may want to freeze some. 

Nutritional Stats:
Calories: 200
Carbs: 23
* Fiber: 3
* Sugar: 7
Fat: 7
Protein: 13
Sodium: 91

PROS:
* Easy to make
* No Bake
* Soft and Chewy (tastes like an unbaked oatmeal cookie)
* Minimal Ingredients (Most I had on hand)
* Can crumble to use on top of yogurt

CONS:
* Contains milk, need to keep in an insulated lunch bag on the go
* Need to be stored in the fridge not on the counter (I don't always have so much room in there)
* Super soft so they break apart easily making it hard to eat on the go

This was very successful but next round I will add some crunchy elements as it was to smushy mushy for me!

Enjoy ^.^
Laura <3

Tuesday, July 16, 2013

Mahi Mahi with Mango Salsa


At my lowest weight I was 173 then, Andrew came along. Being a WLS patient I was so afraid of obsessing over the weight I would gain through the pregnancy, then I read some WLS and Pregnant message boards. So many women were so against gaining weight I felt they were putting the baby in jeopardy of good health. So I decided I would gain what I would gain and I would deal with it after. I gained about 60 lbs, 30 of which I lost before I even left the hospital. The other 30 you ask...well it's crept up to about 37 lbs now and I am still working on evicting it.

Travis and I joined a local gym back in May we were super focused- food, exercise we were there almost every night the entire month. And I got frustrated I didn't lose a single thing! I refused to eat more than 1200 calories per day and I was working out-cardio only. Well it wasn't exactly what I was doing wrong as much as my birth control working against me. Since I have changed that and we have made our minds up to get back at the gym hardcore!

Recently I placed someone at a Shop Rite, this store has an in store nutritionist that shares recipes and new things on the market etc. I snagged a few recipes one was for a pineapple kiwi salsa. Well I did not have any Pineapple...I had Mango...and changed a few other things as well.


3/4 cup diced fresh Mango
3/4 cup peeled, diced Kiwi
2 tbsp. chopped fresh cilantro
3 tbsp fresh lime juice
1 tbsp lime zest


1. Mix all ingredients together and place in refrigerator to chill.
2. Place thawed Mahi Mahi fillets on baking sheet top with salt, pepper, lime zest.
3. Bake 15-20 min

Nutrition Info for Salsa per serving:
Serves 4
Calories: 34
Carbs: 9
Fat: 0
Protein: 1
Sodium: 2
Sugar: 7

After taking fish out of the oven I topped it with more lime juice, plated with 1/2 cup brown rice and sauteed mixed vegetables (Onion, Peppers, Peas, Carrots, Corn, Mushrooms + 2 tbsp EVOO)


Nutritional Stats for my entire dinner:
Mango Kiwi Salsa
4 oz Mahi Mahi
1 serving Brown Rice
Mixed Veg

Calories: 319
Carbs :45
Fat: 7
Protein: 24
Sodium: 113
Sugar: 8


Enjoy ^.^
Laura <3

Saturday, July 13, 2013

Well Hello again...

It has been two years since I last posted. I have visited to look up my recipes many times but have not found the time to post. Life took a spin for the better, and now I am ready to start blogging again. I think it will be good for me to have some designated time for "me" even if it is just a few minutes a night. Let's see in the past two years I have gotten divorced, and am now in an incredibly happy relationship and we have a 1 year old little boy. He was born July 4, 2012 we just celebrated his birthday with a rather large Monster themed party. As you can imagine life has been a crazy roller coaster of doctor appointments, work, family gatherings and firsts. Travis and I have gotten back into a healthy routine including the gym, and cooking better. I look forward to sharing our adventures inside and outside of the kitchen!

<3 Andrew <3

Enjoy ^.^
Laura <3

Monday, May 16, 2011

Oreo Cupcakes


Cookies and Cream cupcakes that morphed themselves into Oreo cupcakes Super yummy I could eat just the frosting and be a happy happy girl!!


For the cupcakes:
24 Oreo halves, with cream filling attached (save the cookie half for use in the frosting)
2¼ cups all-purpose flour
1 tsp. baking powder
½ tsp. salt
8 tbsp. unsalted butter, at room temperature
1 2/3 cup sugar
3 large egg whites, at room temperature
2 tsp. vanilla extract
1 cup milk
20 Oreo cookies, coarsely chopped

For the frosting:
24 cookie side of the Oreo crushed finely
8 oz. cream cheese, at room temperature
6 tbsp. unsalted butter, at room temperature
1 tbsp. vanilla extract
3 cups confectioners’ sugar, sifted

Directions:

1. Preheat the oven to 350˚ F.
2. Line two cupcake pans with 24 paper liners.  Place an Oreo halve in the bottom of each liner, cream side up.
3. In a medium bowl, combine the flour, baking powder and salt; whisk together to blend and set aside.
4. In the bowl of an electric mixer, combine the butter and sugar and beat together on medium-high speed until light and fluffy, about 2 minutes.
5. Blend in the egg whites one at a time, beating well after each addition.
6. Blend in the vanilla extract.
7. With the mixer on low speed, beat in half of the dry ingredients just until incorporated.  Add the milk and beat just until combined, then mix in the remaining dry ingredients.
8. Gently fold in the chopped Oreos with a rubber spatula until evenly incorporated, being careful not to over-mix.
9. Evenly divide the batter between the prepared cupcake liners.
10. Bake for 18-20 minutes, rotating the pans halfway through baking, until a toothpick inserted in the center comes out clean.
11. Allow to cool in the pans 5-10 minutes, then transfer to a wire rack to cool completely.

To make the frosting
1. Combine the cream cheese and butter in the bowl of an electric mixer and beat on medium-high speed until smooth, about 1 minute.
2. Blend in the vanilla extract.  Beat in the confectioners’ sugar until incorporated and smooth, 1-2 minutes.
3. Incorporate cookie crumbs.
4. Increase the speed to medium-high and whip for 4 minutes until light and fluffy, scraping down the sides of the bowl as needed.

Frost the cooled cupcakes as desired.


Garnish:
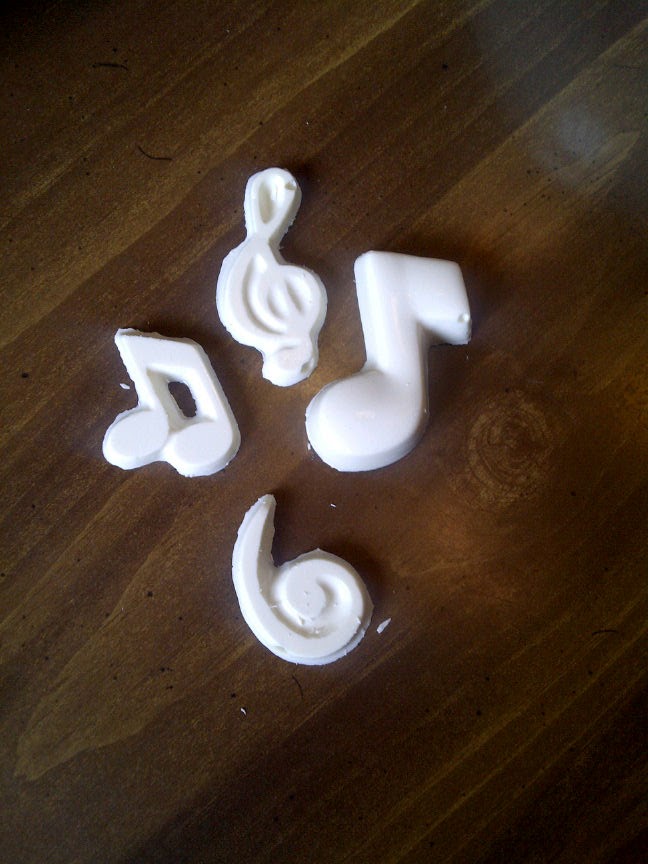
I made chocolate music notes from melting chocolate and molds.


These were very yummy. Warm they were perfect once they cooled the gooeyness kind of glued the wrapper to the cupcake. This made me sad but the two left over were eaten today (3days after they were made) and they peeled away perfectly fine.


Enjoy!
<3 Laura ^.^

Saturday, April 23, 2011

Easter Cupcakes!!


Yup its that time of year. Bright pastel colors, marshmallow peeps, bird chirping etc etc lalalala blah blah blah :) So I took the opportunity to sit down and plan out some cuppycakes for Easter. Most of the designs made the cut...some didn't and others just didn't turn out how I pictured them. But that's ok the ones I did make look really good. Wishing my pictures were better my photography stinks and really doesn't do them justice. I made one type of cake and just decorated them differently. These took a lot of time because I had so many designs to do and couldn't narrow down my creative eye. But it's ok because it's been weeks since I've been able to actually spend time in the kitchen. It was nice especially since no one was home and I had the kitchen to myself.

There are 3 designs:
1.  Chocolate covered peeps

2. Birds Nests

3. Bunny Cupcakes (my personal favorite)

I will do the best I can do break down the designs per ingredient. But I will start with the cake recipe. I tinkered with my white cake recipe, instead of using all purpose flour I used Cake Flour. These came out dense and I have gotten mixed reviews on them so far.

White Cupcake Recipe:
3/4 cup of butter (room temp.)
3 eggs (room temp.)
2 1/2 cups Cake Flour
2 1/2 tsp baking powder
1/2 tsp salt
1 3/4 cups sugar
1 1/2 tsp pure vanilla extract
1 1/4 cups milk

1. Line 24 muffin cups with cupcake liners.
2. In a medium bowl stir together flour,baking powder, and salt.
3. Preheat oven to 350 degrees
4. In a large bowl beat butter with mixer on medium to igh speed. Gradually add sugar, about 1/4 cup at a time beating until combined. Scrape sides of bows; beat about 2min more or until light and fluffy.
5. Add eggs one at a time beating well after each addition.
6. Beat in vanilla extract.
7. Alternate add flour mixture and milk to butter mixture, beating on low speed after each addition just until combined.
8. Using a 1/4 cup measuring cup fill liners, smooth out the top of the batter in each cup.
9. Bake for 18-22min or until wooden toothpick comes out clean. Place on wire racks to cool completely before icing.

Cream Cheese Icing
**I doubled this recipe to have enough to cover and decorate all 24 of my cupcakes**
1 8oz package cream cheese (room temp)
1/2 cup butter (room temp)
2 tsp pure vanilla extract
3 cups powdered sugar
white food coloring
(For making peep cupcakes you will also need light pink, light blue, and light yellow food coloring)

1. Beat butter and cream cheese and vanilla with an electric mixer.
2. Gradually beat in powdered sugar.
3. Once Frosting is fluffy add in white food coloring (more is more here add as much to get the "whiteness" you want.  Adding this will turn the icing white since the butter tinges it yellow and will allow the addition of the colored food coloring to take better.)

Peeps Design:
12 peeps
melted chocolate
1 cup pink colored icing
1 cup blue colored icing
1 cup yellow colored icing

1. Melt chocolate, dip peeps place on wax paper and allow chocolate to set up.
2. While waiting for chocolate to set you can swirl the colored icing on the cupcakes. I used about 1 cup of each color to top 4 cupcakes. I made 4 blue, 4 pink, and 4 yellow.


Birds Nest:
1 cup white icing
9 egg shaped M&Ms
green edible Easter grass as the nest
**This makes 4 cupcakes**


1. Swirl white icing on top of cupcakes
2. wrap the green grass around the cupcakes and form a nest. (yes by looking at the picture I would be a bad bird mommy my babies would freeze I am not a good nest builder!)
3. place eggs in the center of the cupcakes


Easter Bunny Cupcakes:
**8 cupcakes*
8 large marshmallows cut in half diagonally (for the ears)
Pink gel writing icing (this is usually sold in food stores near the bakery and birthday candles)
8 mini marshmallows cut in half (so you have two circles)
8 pink jelly beans (for the nose)
16 black jelly beans (for the eyes)
Shredded coconut

1. Cut the large marshmallow in half diagonally and use the pink gel to fill in the center of the ear.
2. Cut the small marshmallow in half so you have two circles.
3. After icing the top of the cupcake with white icing top with shredded coconut.
4. Place the "ears" on top of the cupcake place two black jelly beans for the eyes the pink for the nose and mini marshmallows for the cheeks.

In the opening image you can see one where I tried to add a "smile" but it looked like crud so I did not repeat on the others. I was also going to try to add whiskers but didn't have black writing gel *shrugs* next time. I will definitely want to make these again. They were super fun!!

I hope everyone has an awesome Easter! Eat lots, drink some, converse with friends and family, and play with the kiddies.


Enjoy!
<3 Laura ^.^